[SOLVED] Destiny 2 Error Code Broccoli – Quickly & Easily!
Destiny 2 is a free online multiplayer FPS game developed by Bungie. Unlike modern battle royale games, Destiny stands out as it incorporates RPG elements. It’s safe to say that Destiny is not your average FPS game. Destiny has become quite popular among FPS enthusiasts and has received multiple DLC content. With that being said, multiplayer games have a knack for having errors and issues. And Destiny 2 is no exception.
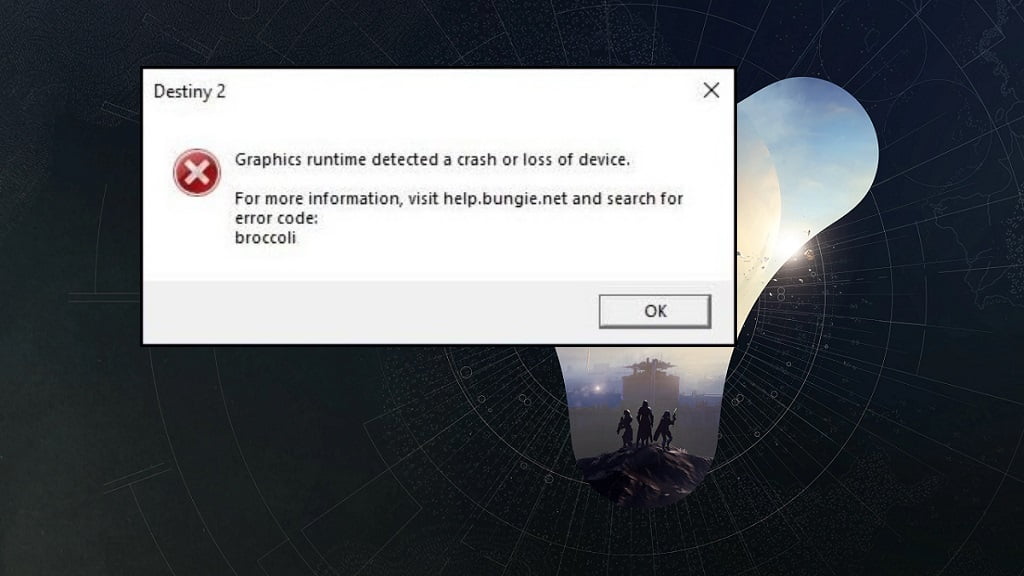
Today, we’ll be looking at the Destiny 2 Error Code ‘Broccoli’ issue. The Broccoli error is usually triggered due to a driver crash. Outdated GPU drivers and Windows build are the reasons for these crashes. Fortunately, some simple fixes may help resolve the issue. We have listed the most effective ones down below.
Before trying out the major fixes, try launching Destiny 2 with administrator privileges. Right-click ‘Destiny 2’ and select the Run as administrator option. Launch the Blizzard ‘Battle.net’ client / Steam client with administrator privileges as well.
Fix #1 – Update Windows
Since outdated Windows build can cause the ‘Broccoli’ error, it is best to install all pending updates. You can install the latest Windows updates by following the steps below:
Step 1: Press Windows+I and select the Update & Security from the menu.
Step 2: Click on Check for updates and install the latest updates. If there are any pending updates already available, install them first.

Step 3: Launch Destiny 2.
Fix #2 – Update Graphics Drivers
Destiny 2 receives regular updates and patches. With new game updates come compatibility issues if the graphics drivers aren’t up-to-date as well. Bungie recommends having the latest graphics drivers to avoid any errors. To update the graphics drivers, follow these steps below:
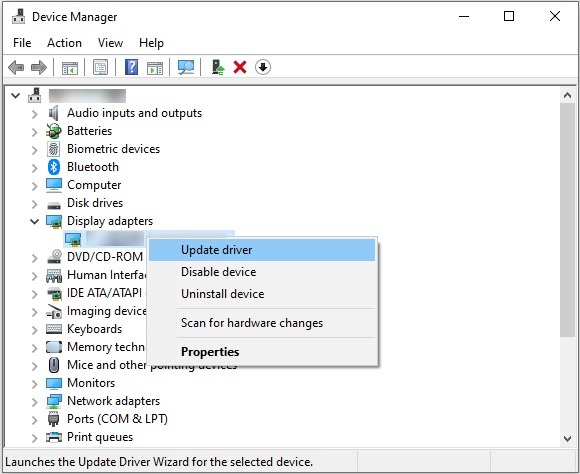
Step 1: Press Windows+X and select the Device Manager option from the menu.
Step 2: In the Device Manager window, under the Display adapters section, right-click and select the Update driver option for each driver one by one.
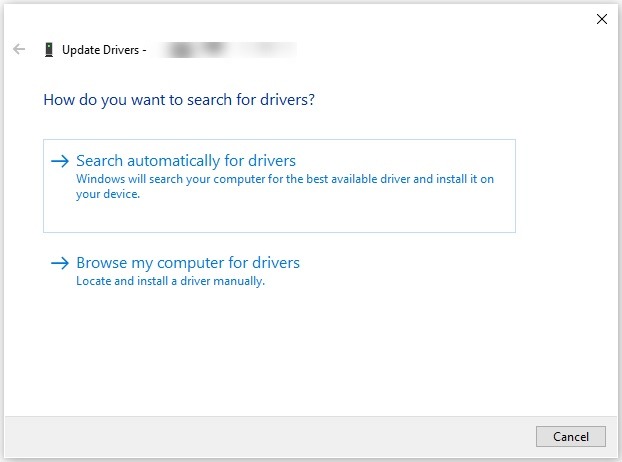
Step 3: Select the Search automatically for drivers option and follow the on-screen instructions to complete the installation process.
Step 4: Restart PC and launch Destiny 2.
Fix #3 – Verify Game Files Integrity
Sometimes, the game files may be causing the issue. If the game files have gone bad or missing, then the game is bound to cause errors.
In such a situation, verifying the integrity of game files is the best course of action. This will replace any corrupted files and add the ones that are missing. Unfortunately, a complete reinstallation is required for the consoles. To verify the integrity of game files on PC, follow these steps:
For Steam:
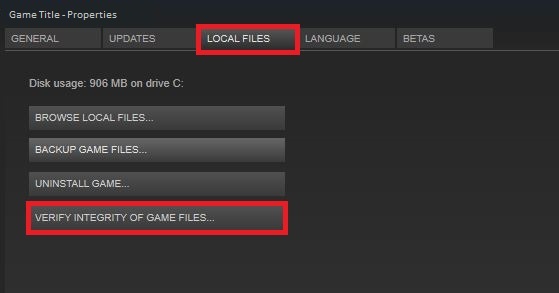
Step 1: Launch the Steam client. In the Library section, right-click Destiny 2 and select the Properties option.
Step 2: Go to the Local Files section and select the Verify integrity of game files option. Wait for the process to complete.
Step 3: Launch Destiny 2.
For Blizzard:
Step 1: Launch the Blizzard Battle.net client. Navigate to the Destiny 2 game section.
Step 2: Click on the Options button and select the Scan and Repair option. Follow the on-screen instructions to complete the process.
Step 3: Launch Destiny 2.
Fix #4 – Disable Windows ‘Game Mode’ Feature
Windows ‘Game Mode’ feature enhances the PC gaming experience. However, for Destiny 2, it seems to have the opposite effect for some reason. Players have reported that disabling the feature resolves the ‘Broccoli’ error code. To disable the Windows ‘Game Mode’ feature, follow the instructions below:
Step 1: Press Windows+I and select the Gaming section from the menu.
Step 2: From the left pane, select the Game Mode option. Toggle Off the Game Mode.
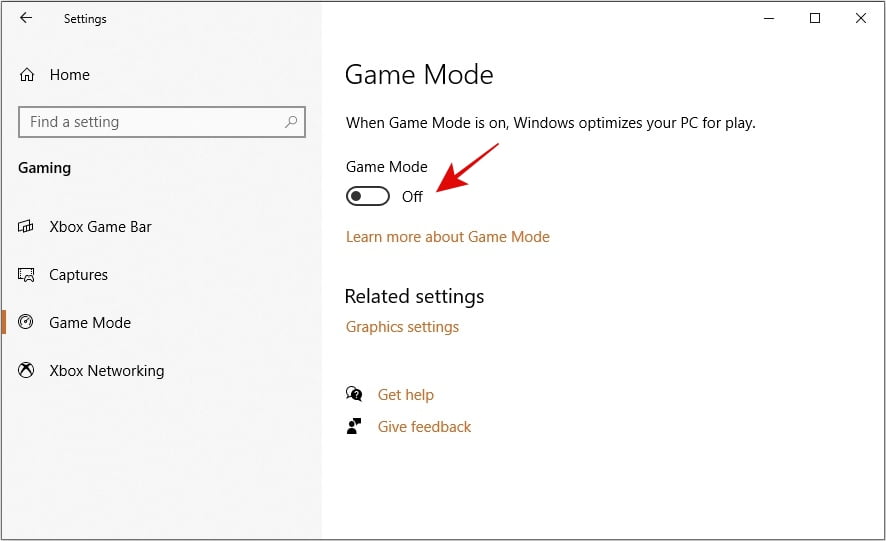
Step 3: Launch Destiny 2.
Fix #5 – Reinstall Destiny 2
If nothing has worked out so far, then as a last resort, you should reinstall Destiny 2. To reinstall Destiny 2, follow the given steps:
Step 1: Press Windows+S and type in “Control Panel” in the search bar. Open the Programs section from the menu.
Step 2: Click on the Uninstall a program option under the Programs and Features section.
Step 3: Locate Destiny 2 from the list of programs and uninstall it. Wait for the process to complete. Delete any remaining files from the Destiny 2 installation directory manually after the uninstallation.
Note: Alternatively, you can uninstall the game using the game clients (Blizzard/Steam) as well.
Step 3: Reinstall the game using the Blizzard/Steam client. Launch Destiny 2.
For any queries and suggestions, comment down below.
![[Fixed] Gears of War 4 Crashing Issue on PC](https://digiworthy.com/wp-content/uploads/2019/02/gears-of-war-4-pc_crashing-768x432.jpg)
![[2020 FIX] GeForce Experience Error Code 0x0001](https://digiworthy.com/wp-content/uploads/2020/05/nvidia-geforce-experience-error-768x432.jpg)
![[FIXED] FFXIV Unable To Complete Version Check Error](https://digiworthy.com/wp-content/uploads/2022/05/FFXIV-Version-Check-error-768x463.jpg)

![[Fixed] Apex Legends ‘Invalid Game Executable’ Launch Error](https://digiworthy.com/wp-content/uploads/2023/04/Apex-Legends-Invalid-Game-Executable-768x412.jpg)