How to Fix Overwatch Mic NOT Working Issue
Overwatch is a team-based FPS multiplayer game developed by Blizzard. Overwatch took the world by storm on its release in 2016 and quickly became one of the best and most popular games today. Even with the announcement of a sequel a few years back, the game is still played massively and is also featured as a major esports title.
Now, for a team-based FPS multiplayer, communication is an essential and effective part of the game. However, players facing microphone issues are unable to communicate properly with their team, leading to a mediocre and a ‘not so fun’ game experience.
What causes the issue?
The microphone issue is very common among FPS players in general, and Overwatch is no exception. Fortunately, it’s not rocket science to fix these issues once you know what exactly is wrong with the microphone.
Starting with the most obvious one, there are going to be problems if the mic is damaged or broken. Certain microphone privacy settings can also cause issues with the mic for different apps. Other reasons include unadjusted in-game audio settings, outdated audio drivers, and improper ‘Default Device’ settings.
Overwatch Mic NOT Working? Try these Fixes
- Check Your Microphone
- Adjust Microphone Privacy Settings
- Update Audio Drivers
- Adjust In-Game Audio Settings
- Setting Microphone as ‘Default Device’
- Disable ‘Exclusive Mode’
Fix 1: Check Your Microphone
The first thing to do is to check if there are any problems with your microphone. Check if the microphone cable is properly connected. Check and see if the microphone isn’t damaged/broken by any chance. You can also try using the microphone with any other multiplayer game and testing the microphone. If the microphone is connected and working properly, then the issue could lie with the Overwatch in-game settings or the ‘Default Device’ settings. In any case, try applying the other fixes listed below.
Fix 2: Adjust Microphone Privacy Settings
If you have changed your microphone privacy settings to restrict apps from accessing the microphone then that is what’s causing the issue in the first place. In this case, you can adjust your microphone privacy settings to allow Overwatch to access your mic. This will help fix the issue almost immediately.
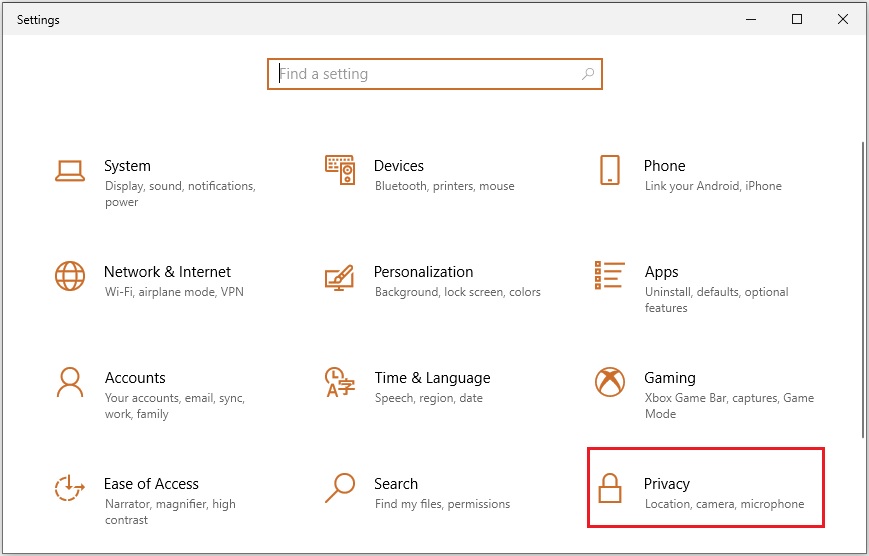
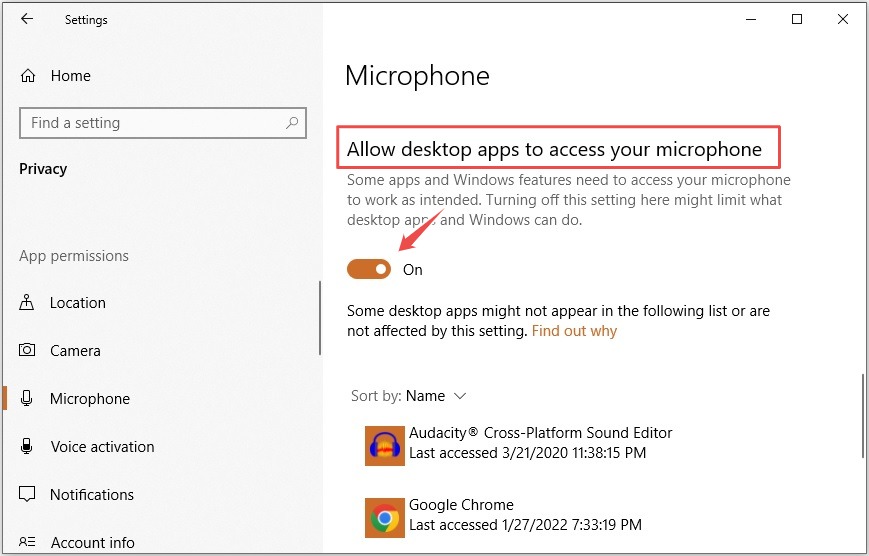
1. Press Windows key + I to open the Settings menu. Click on the Privacy option.
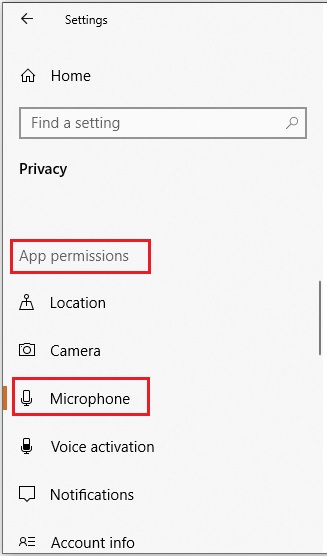
2. From the left pane, scroll down and click on the Microphone option in the App permissions section.
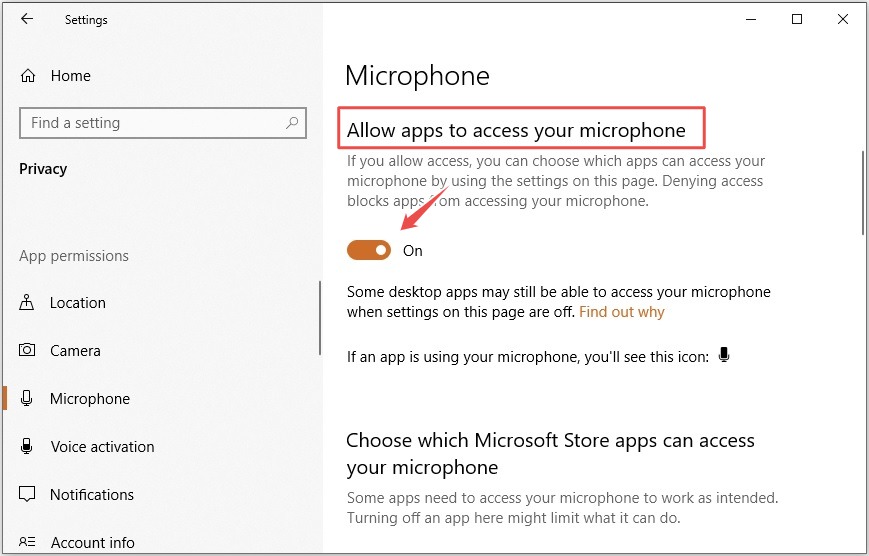
3. Toggle ON the Allow apps to access your microphone option, if it isn’t already so.
4. Scroll down to the Allow desktop apps to access your microphone section. Toggle ON the setting.
Fix 3: Update Audio Drivers
If the microphone/headset is still not working as intended, then outdated audio drivers might be the problem. To update the audio drivers, follow the steps below:
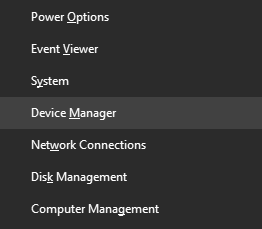
1. Press Windows key + X and select the Device Manager option from the menu.
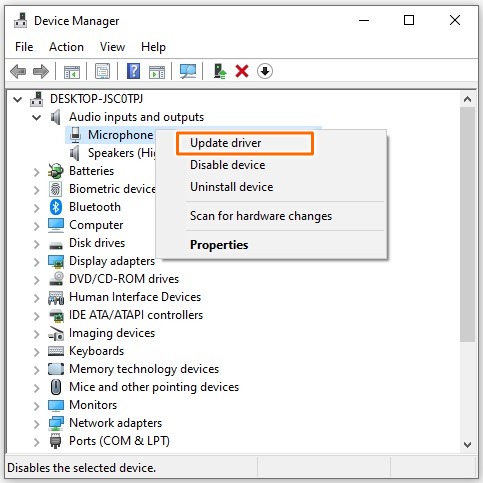
2. From the list of drivers, search for the Audio inputs and outputs option and double-click it.
3. Right-click each driver in this section and select the Update driver option.
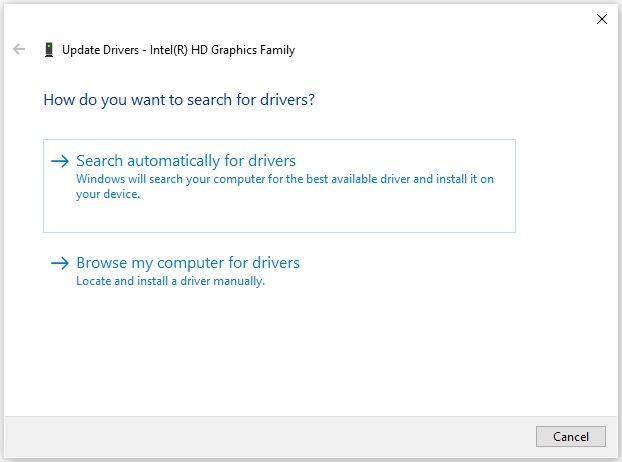
4. Select the Search automatically for drivers option. Follow the on-screen instructions to complete the update process.
Fix 4: Adjust In-Game Audio Settings
You can try adjusting your microphone using the in-game audio settings. While they are automatically configured the first time you play the game, it’s still worth a shot.
1. Launch Overwatch. Go to Options > Sound.
2. Turn up the Voice Chat Volume and Voice Chat Mic Volume to max.
3. Set the Group Voice Chat and Team Voice Chat to Auto Join.
Note: If the ‘Auto Join’ option isn’t working out for you. Set it to ‘ON’. Experiment with both settings and select the one that gives you the best result.
4. Adjust the Voice Chat Mode to either Push to Talk or Open Mic and see which one works the best for you.
Note: For ‘Push to Talk’ mode, change the key binding in the ‘Controls’ section. This has been helpful for many players. If it ends up working, you may need to change the key binding for other heroes as well.
5. Set the Voice Chat Devices option to Comms Devices.
6. Play the game, test out the voice chat and see if the issue is resolved or not.
Fix 5: Setting Microphone as ‘Default Device’
It also could be that the headset is disabled or not set as the default I/O device. Low sound levels can also be the reason for the headset not working as intended. Follow the steps below to configure your microphone/headset and set it as the ‘Default Device’.
1. Press Windows key + R to open the Run window. Type “mmsys.cpl” and press Enter. The Sound window will open.
2. In the Sound window, navigate to the Recording tab.
3. Right-click and set your mic/headset as the Default Device and the Default Communication Device.
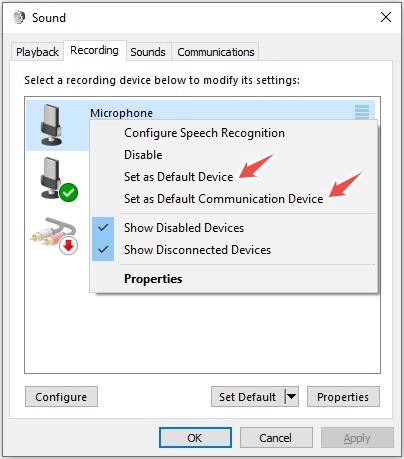
4. Click Apply and OK to save the settings.
5. Right-click on the headset (Default Device) and go to Properties. Go to the Levels tab and raise the slider to 100.
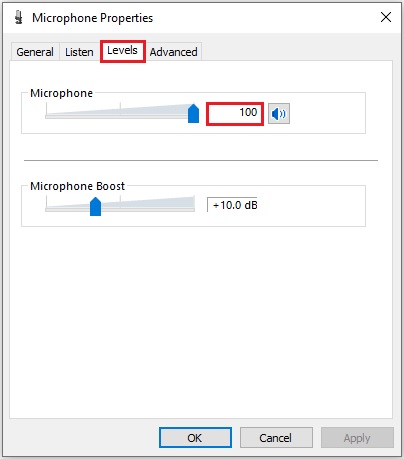
6. Click Apply and OK to save the settings.
Fix 6: Disable ‘Exclusive Mode’
‘Exclusive Mode’ can let third-party apps take control of the microphone. In this case, the mic access would be restricted to a particular app only, and the Overwatch microphone won’t work. Disabling the ‘Exclusive Mode’ can help resolve the issue.
1. Press Windows key + R to open the Run window. Type “mmsys.cpl” and press Enter. The Sound window will open.
2. In the ‘Playback’ tab, right-click the headset (Default Device) and then click on the Properties option.
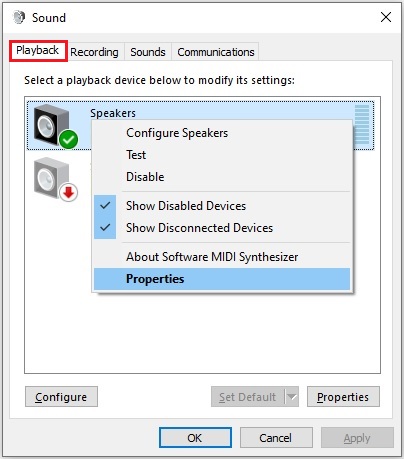
3. Go to the Advanced tab and uncheck everything under the Exclusive Mode section.
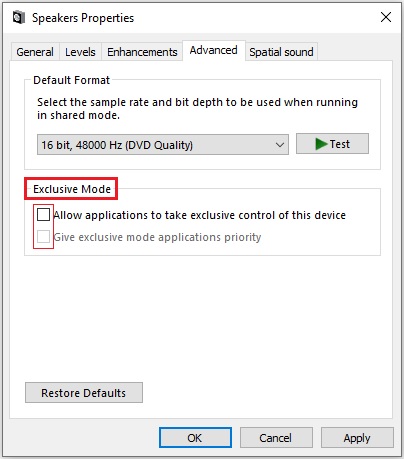
4. Click Apply and OK to save changes. Restart if need be.
5. Launch Overwatch.
READ NEXT