[2020 Fix] Overwatch Lost Connection to Game Server
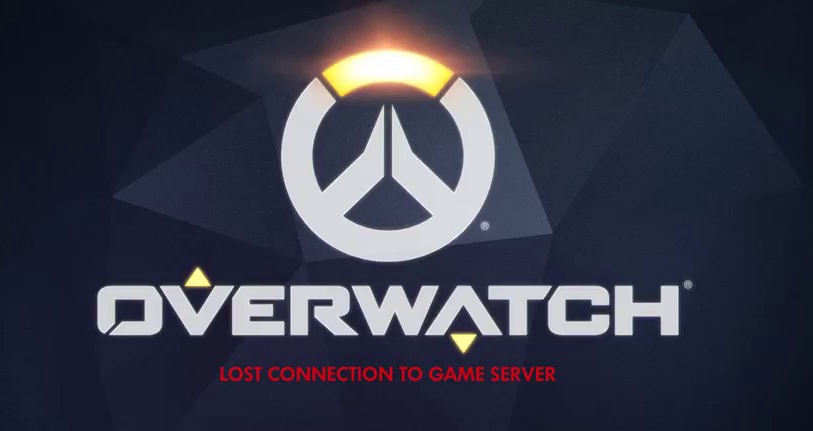
Say you’re in the middle of your Overwatch game and suddenly you get the message “Lost connection to game server”. This is very irritating as an Overwatch player but let me tell you that you are not the only one who’s facing it; there are other players who reported this error too.
According to some users, the network was lost while they were in the game and then they were unable to login into Overwatch again. Others reported that they are stuck at the login page and couldn’t enter the game at all.
If you are continuously losing connection and receiving the Overwatch lost connection to game server error on Windows 10, 8, or 7, we have put together some fixes to help you.
How to Fix Overwatch Lost Connection To Game Server Error
Normally, this error occurs due to some problem with your internet connection and thus the first step should be to check the network connection. Turn off your wireless router and switch on after a few seconds and check if the internet is working.
Now if the internet connection is ok, your game should run properly too. However, if it’s still giving the error, you should try the following fixes:
- Update your network driver
- Reset Winsock Data
- Flush your DNS and renew your IP
- Disable Proxy Server
- Close the bandwidth hogging applications
- Use Blizzard’s Network Diagnostic Tool
Fix 1: Update your network driver
This error can occur if the driver on your system is outdated or is missing. You can try updating the network driver to fix the issue. Here’s how to do it:
- Go to the manufacturer’s website and download the latest version of your network driver.
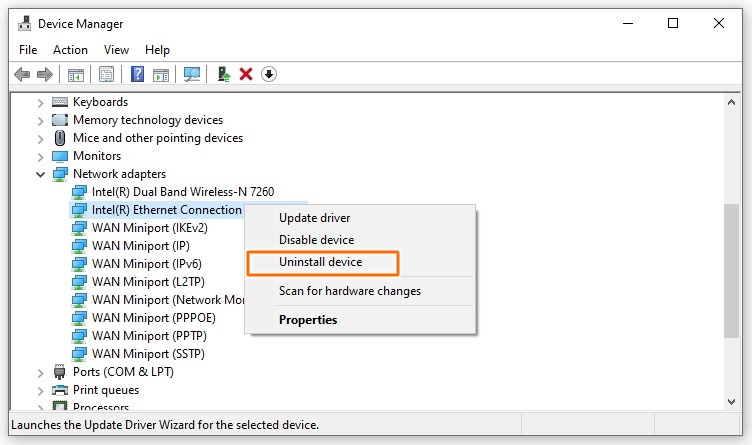
- Next, type ‘device manager’ in the Windows Search box and click to open it from the list of search results.
- Locate Network adapters and expand it. Then right-click on the network driver and select Uninstall.
- Find the network driver package that you downloaded in step 1 and install it on your PC.
Fix 2: Reset Winsock Data
According to some Overwatch users, resetting the Winsock data was helpful in fixing this error. Winsock is a Windows program that helps in managing how the software accesses the network services. Following are the steps for resetting the Winsock data:
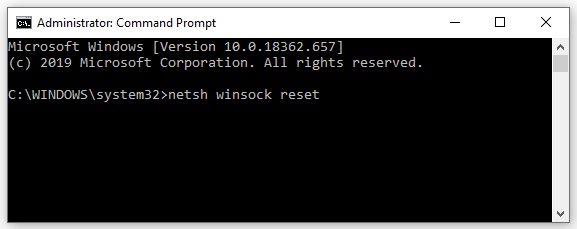
- Type ‘cmd’ in the Windows Search box. Right-click Command Prompt as it appears as a search result and select Run as administrator.
- Input ‘netsh winsock reset’ in the Command Prompt window and press Enter.
- Now reboot your PC and launch Overwatch to see if it can connect to the game server.
Fix 3: Flush your DNS and renew your IP
For some users, flushing the DNS server address has also worked. Sometimes it happens that the DNS and IP address are the reason for the “lost connection to game server” error. In this scenario, all you have to do is to flush the DNS server and then renew the IP address. To flush the DNS server, carry out these steps:
- Start the Run dialog box by pressing the Windows key + R.
- Type ‘cmd’ in the dialog box and press Ctrl + Shift + Enter simultaneously so that Command Prompt runs as administrator.
- A message will appear for permission, click on Yes to proceed.
- Now input ‘ipconfig /flushdns’ in the Command Prompt window and press Enter. The DNS will be flushed this way.
Now renew the IP address by following these steps:
- Open the Run the dialog box by pressing Windows key + R.
- Type ‘cmd’ and press Ctrl + Shift + Enter at the same time to run the Command Prompt as administrator.
- Click Yes to give permission.
- Type ‘ipconfig /release’ in the Command Prompt window and press Enter.
- Next, type the command line ‘ipconfig /renew’ and press Enter.
Once done, run Overwatch again to see if it resolves your issue.
Fix 4: Disable Proxy Server
Are you using a proxy server? If yes, then it may be the reason behind your connection problem. You can simply disable your proxy server to fix the problem. Here’s how to do it:
- Open the Run dialog box by pressing Windows key + R.
- Type ‘inetcpl.cpl’ in the dialog box and press OK.
- Go to the Connections tab and click Never dial a connection, then click on LAN settings.
- In the new window, uncheck the box of Use a proxy server for your LAN and check the box of Automatically detect settings. Then click OK.
- Now if you’re using a proxy server, disable it.
Fix 5: Close the bandwidth hogging applications
There are some apps such as iCloud, Dropbox, and OneDrive that use the internet connection for downloading and uploading the files. Also, if there are many devices connected to the same internet connection or your family members are watching online shows, Overwatch may lose the connection to the server. To resolve the issue, you need to shut down the bandwidth hogging apps:
- Press Ctrl + Shift + Esc simultaneously to open the Task Manager.
- Right-click on the bandwidth hogging apps one by one and select End task for each of them.
- Launch Overwatch again and check if it’s working.
Fix 6: Use Blizzard’s Network Diagnostic Tool
If you’re frequently receiving the Overwatch “lost connection to game server” error, we highly recommend that you test the server connection. To do so, you can use Blizzard’s network diagnostic tool known as Battle.net Looking-Glass. Follow these steps to test your server connection:
- Visit Blizzard’s Battle.net Looking-Glass.
- There, you’ll see an interface showing 3 options. Select your region for first, select Overwatch as the service, and finally check all the boxes to select testing items.
- Then click the ‘Run Test’ button.
- Once you receive the test results, post on the Official forum of Overwatch so that they can help you analyze the issue.
We hope that one of the above six fixes will work for you and you won’t get this annoying error again.

![Fixed: COD Modern Warfare Dev Error 6178 [2022 Update]](https://digiworthy.com/wp-content/uploads/2021/01/Dev-Error-6178-Modern-Warfare-img0-768x432.jpg)
