Fix: Update Error 0xc19001e1 on Windows 10 [Step-by-Step Guide]
Many people are reporting the Windows Update error 0xc19001e1 on PC. The error appears due to corrupt system files that may restrict the update of either Windows 10 OS or the system applications. It may even cause the third-party apps to stop all of a sudden. In this post, we try to solve the problem through a number of workarounds. So let’s get started!
How to fix Update Error 0xc19001e1 on Windows 10
Usually, you can get rid of the Windows Update error 0xc19001e1 on your device by fixing the corrupt system core files and bugs in the cumulative update. Here are some effective methods that helped many users solve this problem:
- Check the disk space for installing Updates
- Run SFC command
- Run Windows Update Troubleshooter
- Update your graphics card driver
- Disable third-party antivirus software
- Reset Windows Update Components
Fix 1 – Check the disk space for installing Updates
You may get the Windows Update error 0xc19001e1 if you don’t have enough disk space on the disk. Windows requires a bare minimum of 20 GB for fresh installation and 2 GB for Windows up-gradation. If your PC doesn’t have enough space as per Microsoft recommendation, you’re likely to encounter this bug.
Therefore, you must check the minimum system requirements for the Update you want to install. Then proceed only if you have enough space or otherwise try to release the space first.
Fix 2 – Run SFC command
You can run the system file checker (SFC) command to solve the 0xc19001e1 error. This command line will scan all the Windows files and repair any that are broken. Here’s how to do it:
1) Type “cmd” in the Windows search bar, then right-click on the Command Prompt result and select Run as administrator. Click Yes if you’re prompted for permission.
2) In the Command Prompt window, input the following command and press Enter:
sfc/scannow
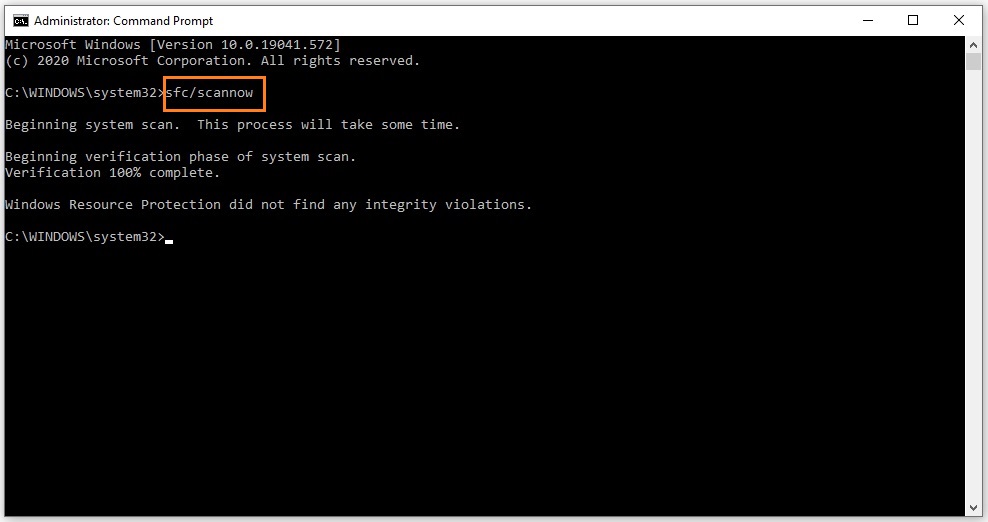
3) Wait a few minutes for the process to complete the scanning of different files.
4) When it is over, restart your computer and update the previous Windows operating system.
Fix 3 – Run Windows Update Troubleshooter
The Windows built-in troubleshooter is an effective way to repair several general bugs. Follow these steps to troubleshoot the Update error 0xc19001e1:
1) Type “troubleshoot” in the Windows search bar and click Troubleshooting settings.
2) On the right, click Additional troubleshooters.
3) Click the Windows Update option and hit Run the troubleshooter to begin the detecting and repairing process.
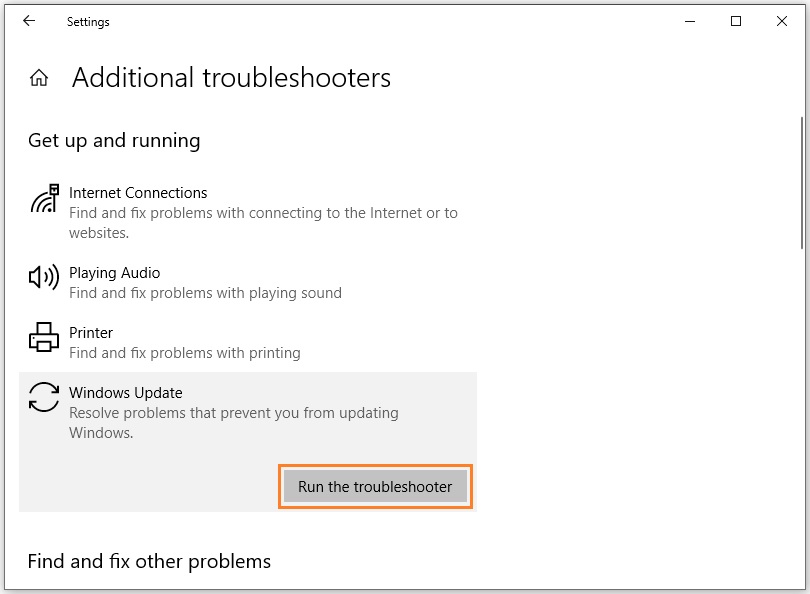
4) Once the process is complete, reload the Windows and check if the problem has been resolved.
Fix 4 – Update your graphics card driver
An outdated or missing display driver can trigger the Update error 0xc19001e1 on Windows PC. If that’s the case, you should update your graphics driver to solve the problem. Here are the steps to follow:
1) Press Win+X keys and select Device Manager from the menu list.
2) Expand the Display adapters option.
3) Right-click on the installed graphics chipset and select Update driver.
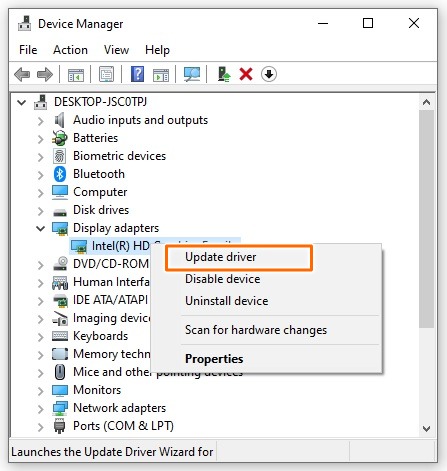
4) Choose the first option i.e., Search automatically for updated driver software.
5) If Windows couldn’t update it, then download and install the latest driver version from its manufacturer’s website.
Now restart your computer for the changes to take effect.
Fix 5 – Disable third-party antivirus software
In general, users download third-party antivirus programs to safeguard their PC from malware or cyber threats. However, sometimes, in a bid to protect your computer, the antivirus halts the ongoing Windows update, leading to the 0xc19001e1 error on your device.
To avoid this issue, you should stop using third-party anti-malware and rather update the pre-existing Windows Defender on your device. Windows Defender comes built-in with Windows 10, and it’s more than good enough to get the job done.
Fix 6 – Reset Windows Update Components
The error 0xc19001e1 may be caused by the corrupt Windows tools. In this scenario, you can choose to reset Windows Update components. Here’s how to proceed:
1) Type “cmd” in the Windows search bar, then right-click on the Command Prompt result and select Run as administrator.
2) Click Yes if you’re prompted for permission.
3) In the Command Prompt window, input the following commands one by one and hit Enter on each:
net stop wuauserv
net stop cryptSvc
net stop bits
net stop msiserver
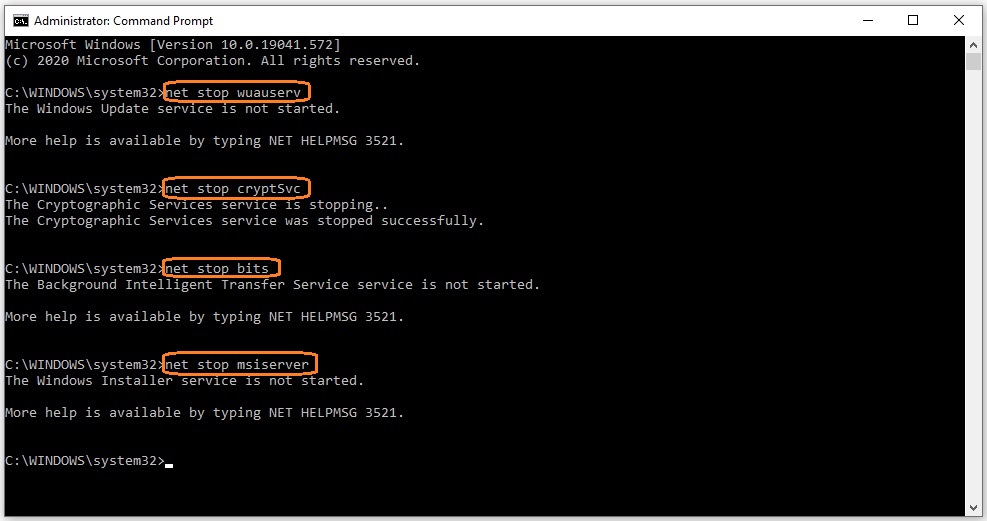
This will stop the BITS, Cryptographic, MSI Installer, and Windows Update services.
4) Now, execute the following command lines to rename the SoftwareDistribution and Catroot2 folder:
Ren C:\Windows\SoftwareDistribution SoftwareDistribution.old
Ren C:\Windows\System32\catroot2 Catroot2.old
5) Afterward, restart the services that you previously paused using the following command lines:
net start wuauserv
net start cryptSvc
net start bits
net start msiserver
When the process is finished, restart your computer and try downloading and installing the Windows updates and you should no more encounter the error.
There you have it – 6 easy ways to fix the Windows Update error 0xc19001e1 on your PC. Be sure to hit us up in the comments if you have any specific questions!
READ NEXT