SS3svc64.exe prompt on startup: Here’s what you need to do

Some Windows users report that they see an SS3svc64.exe prompt at every startup asking them to allow the process to make changes to the computer. According to the reports, this process is consuming a lot of system resources constantly, and in some cases, has multiple instances running at the same time. If you’re using a 3rd-party antivirus, chances are that the antivirus will flag it for suspicions of being a virus.
In this post, we will be informing you of the origin of the ss3svc64.exe process, followed by a step-by-step guide on how to get rid of this ss3svc64.exe on startup issue. So let’s get started!
What is SS3svc64.exe and should you remove it?
SS3svc64.exe is a software component belonging to Sonic Suite 3 which comes along with the ProductDaemonSetup Software developed by AsusTek Computer, Inc.
The software allows the end user to modify the computer’s audio effects from a GUI interface. In addition to this, it can be used to troubleshoot issues related to the sound output. The tool is available exclusively on the Windows platform.
The genuine ss3svc64.exe file is in no way a security threat to the operating system. But for that, you have to be sure that the file is indeed genuine and safe. Most malware of today have camouflaging capabilities and ss3svc64.exe is kind of the perfect target for them to avoid detection.
The easiest way to verify if it’s a legit file is to check if you have the parent application installed. If the Sonic Suite 3 application is not installed on your computer, then there’s no reason why the ss3svc64.exe process should be using system resources. In that case, it’s highly recommended that you use a powerful anti-malware software and remove any infected files.
Even if it’s a legit file, the ss3svc64.exe plays no important role in the functioning of your operating system, so removing it will not make any system-wide difference to your computer. This executable would be relevant only if you’re using the Sonic Suite service, otherwise you can safely remove it without reverting the changes to the default sound values of your PC.
How to Prevent SS3svc64.exe Prompt on Startup
Below are some effective ways to prevent the s3svc32.exe process from asking permission on startup:
- Run SS3svc64.exe as an administrator
- Uninstall Sonic Suite 3
- Perform a clean boot
- Rename ss3svc64.exe file
Before you start, try to end the ss3svc64.exe process as follows:
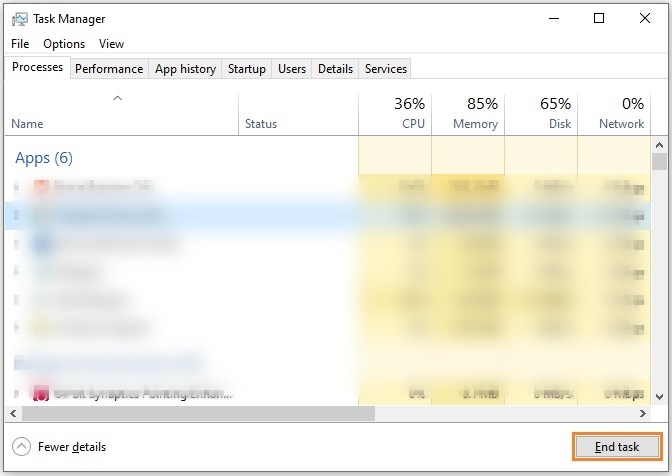
1. Press Ctrl-Shift-Esc keys simultaneously to open the Task Manager.
2. In the the Processes tab, select the SS3svc64.exe file and click on the End task button to terminate the process.
Fix 1 – Run SS3svc64.exe as an administrator
Many users managed to resolve this issue by giving the administrative privileges to the SS3svc64.exe file. Here’s how you do it:
1. Press Win+E keys to open the Windows Explorer.
2. Navigate to the following location:
C:\Program Files\ASUSTeKcomputer.Inc\Sonic Suite 3\Foundation\
3. Locate the the SS3svc64.exe file, right-click on it and select Properties.
4. Go to the Compatibility tab and check the box parallel to Run this program as an administrator.
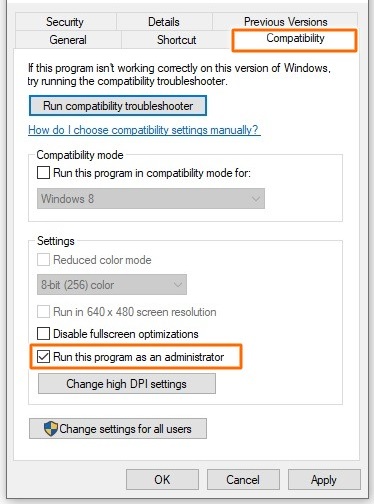
5. Click Apply > OK to save your changes.
Hopefully, the ss3svc64.exe prompt will no longer appear on startup for Windows 10.
Fix 2 – Uninstall Sonic Suite 3
You can avoid the ss3svc64.exe prompt on startup by simply uninstalling the Sonic Suite 3 software. Here are the steps:
1. Press Windows key + R on the keyboard to open the Run utility.
2. Type “appwiz.cpl” in the text box and hit Enter.
3. Locate Sonic Suite 3 from the list of installed programs, right-click on it and select Uninstall.
4. Now press Win+E keys to open the Windows Explorer.
5. Navigate to the following location and delete everything related to “ss3svc64.exe”:
C:\Program Files\ASUSTeKcomputer.Inc\Sonic Suite 3
After you’ve installed this application, check to see if the ss3svc64.exe prompt still asks for permission during the startup. If it does, continue to the next solution.
Fix 3 – Perform a clean boot
A clean boot allows you to start Windows with a minimal set of drivers and startup programs, so that you can determine what application or program is causing the problem. Follow these steps to do so:
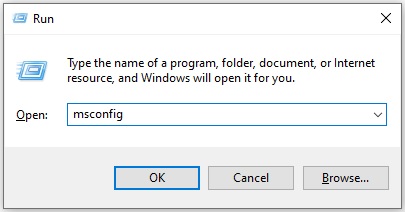
1. Press Win+R keys to open the Run dialog.
2. Type “msconfig” in the text box and hit Enter.
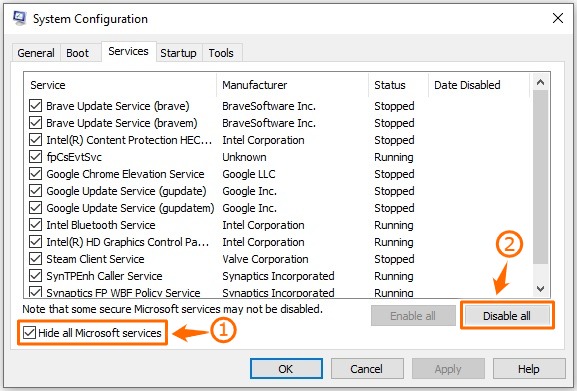
3. Click the Services tab and check the box parallel to Hide all Microsoft Services at the bottom. Then click the Disable all button.
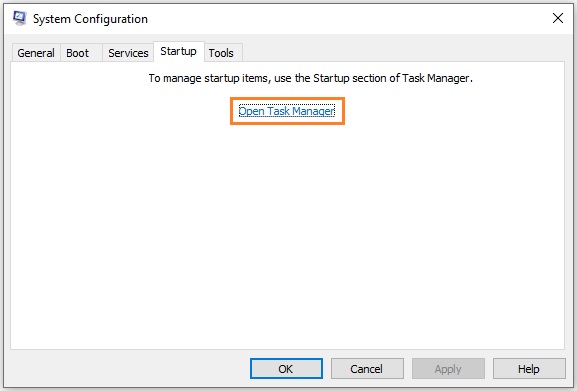
4. Now go to the Startup tab and click Open Task Manager.
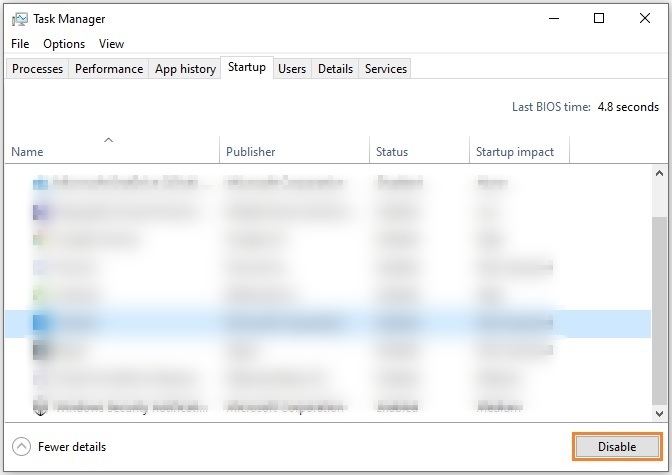
5. Select each service related to Sonic Suite 3 and then click on the Disable button to prevent them from launching on startup.
6. Restart your computer, and most probably, you won’t encounter the ss3svc64.exe on startup issue again.
Fix 4 – Rename ss3svc64.exe file
If the problem continues to appear even after applying the above workarounds, we recommend renaming the ss3svc64.exe file. For this, navigate to the location of the self startup file and change the name of the file from “ss3svc64.exe” to “ss3svc64Old.exe”. Now check to see if the problem continues to occur when you start your computer.
We hope this guide has solved your problem, but you’re welcome to comment down below if you have any questions. Thanks for reading!