Fix: Windows 10 Fingerprint Sign-in options not available

So you want to set up fingerprint on your Windows 10 PC but the problem is your setup button is greyed out. Well, worry not, because you’re not the only one to encounter this problem. Many Windows 10 users have reported that the PIN and Fingerprint Sign-in options aren’t available as the buttons are disabled/greyed out.
In this tutorial, we will help you fix this issue so that you can successfully enable fingerprint in Windows 10. So without further ado, let’s get started.
Fingerprint Sign-in options aren’t available (greyed out) in Windows 10
Solution #1 – Set up PIN on your PC first
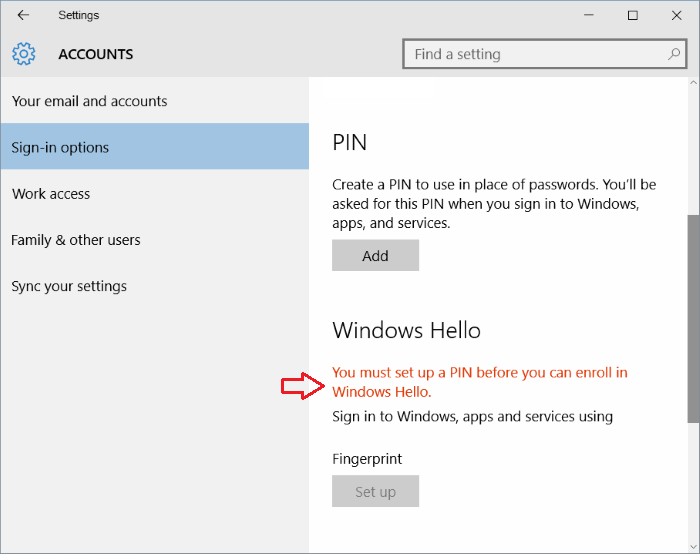
A lot of Windows 10 users are not aware of the fact that you have to set up PIN first in order to be able to set up fingerprint. If you haven’t set up PIN, you will see a message saying “You must setup a PIN before you can enroll in Windows Hello” just above the Fingerprint setup button.

Since you can’t set up a PIN without signing in to a Microsoft account, this means the latter is a must to be able to use fingerprint scanner for your device.
If you’re sure that you are using a Microsoft account to sign in to Windows 10, then set up PIN on your PC. Note that your PC must be connected to the Internet in order to set up PIN.
Solution #2 – Make sure the fingerprint scanner drive is installed
If your Windows 10 PC is equipped with a fingerprint scanner and you have the correct driver installed, then you should see the Fingerprint section under Settings > Accounts > Sign-in options. On contrary, there would be no Fingerprint section if you’re missing the fingerprint scanner or if the driver for that scanner is not correct.
In case you have fingerprint scanner but it’s not appearing in the Windows 10 Sign-in options, then you should visit your PC manufacturer’s website and download the latest version of the driver for your fingerprint scanner.
If the fingerprint option still doesn’t show up after installing the driver, you can update your device’s driver in Windows Device Manager as follows:
- Right-click on Start button on desktop to open the power user menu and then click Device Manager.
- If your PC has a fingerprint sensor, you will see a Biometric devices entry in Device Manager.
- Expand this Biometric devices entry, right-click on your fingerprint scanner and select Update Driver Software…
- Next, click the first option labeled Search automatically for updated driver software. Windows 10 will then automatically search for the newest version of the driver and install it, if available.
Solution #3 – Turn on fingerprint scanner in BIOS/UEFI
Many PCs have the option to turn on or off the fingerprint scanner in BIOS or UEFI settings. So if the above solutions fail to work for you, open BIOS/UEFI and head over to the security section to see if there is an option to turn on or off the fingerprint scanner.
Also check out:
We hope that you found our guide helpful and that you managed to fix the fingerprint setup problem on your Windows 10 PC.