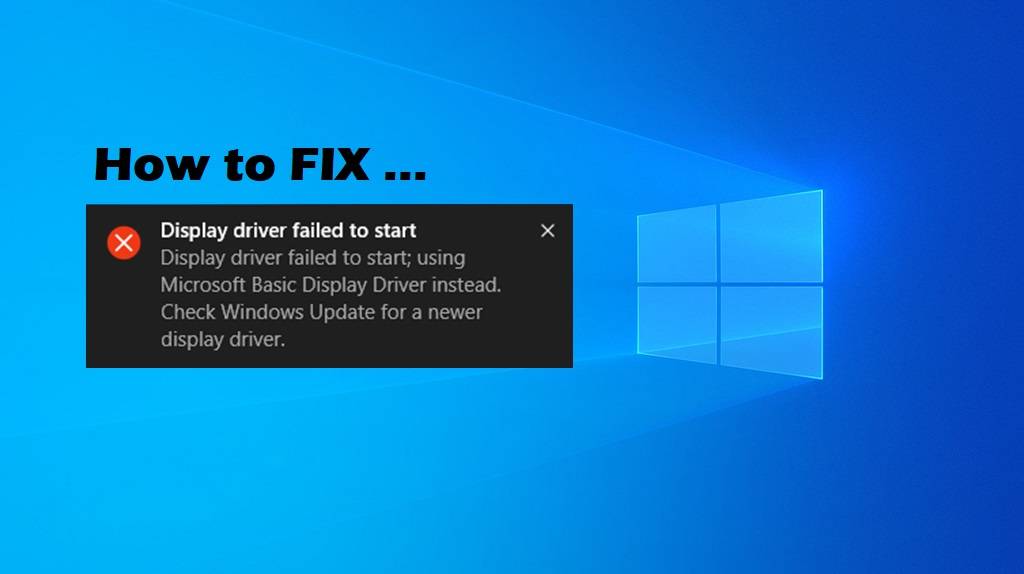
[Fixed] Display Driver Failed to Start Error in Windows 10
If the drivers run into issues or fail to start properly for whatever reason, the PC can give different errors and operate at a reduced functionality. Essentially, the “Display driver failed to start” error is also caused due to a driver failure. The PC display is brought to life by the graphics card and its associated drivers.
When the graphics drivers run into issues, it can render your graphics card useless. Subsequently, you won’t get any graphics performance and certainly run into display problems. The PC may automatically shift to the ‘Microsoft Basic Display Driver’, however, functionality will be limited.
What causes Display driver failed to start Windows 10 Error
There can be many reasons as to why the error occurs. It may be as simple as a PC failing to boot up and load drivers properly. Outdated or corrupt drivers can also lead to the error. Outdated Windows and corrupted Windows files are another reason this can happen. Performing any graphic intensive work may also lead to error. Malware/Viruses are just as bad and can trigger the error.
Similar Types of Display Driver Failed to Start Issue
- Display driver failed to load AMD
- amdwddmg not started
- Miniport driver failed to add device with status 3221225473
- Miniport driver failed to start device with status
Try these Fixes
If you’re getting the “Display driver failed to start” error, then you must try out the following methods. You can try the following fixes one by one until you get your issue solved.
- Restart Graphics Driver
- Update, Rollback, Reinstall Graphics Drivers
- Update Windows
- Run an SFC Scan
- Scan PC for Malware/Virus
- Use Windows Restore
- Reinstall Windows
Fix #1 – Restart Graphics Driver
If you are getting this error for the first time then the fix may be just as easy as restarting the graphics driver. Press Win + Ctrl + Shift + B simultaneously: your screen flickers, there’s a beep, and then the display driver is restarted. This procedure doesn’t involve touching any custom settings so everything should work exactly as it did before.
Fix #2 – Update, Rollback, Reinstall Graphics Drivers
One of the more common causes for this error is outdated or corrupt graphics drivers. In some instances, incompatible graphics drivers may also be the issue. In this case, a rollback to the previous driver version may be necessary. To update, roll back, or reinstall the graphics drivers, follow the instructions below.
Update Drivers:
1) Press Windows+X and open the Device Manager from the menu.
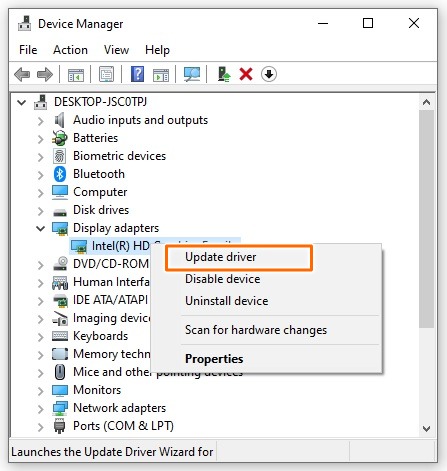
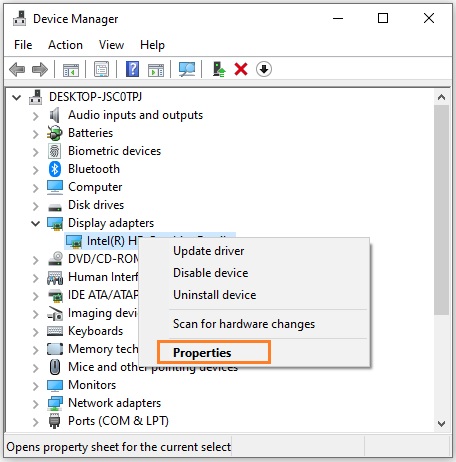
2) Expand the Display adapters section, right-click each driver (one at a time), and then select Update driver to start the update process.
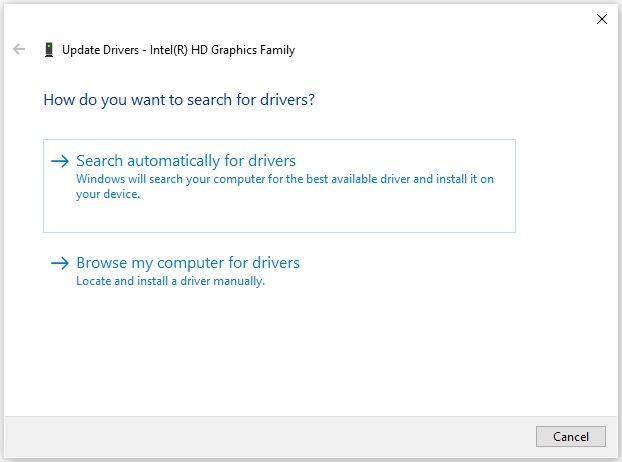
3) Select the Search automatically for drivers option and follow the on-screen instructions to complete the update process.
Roll Back Drivers:
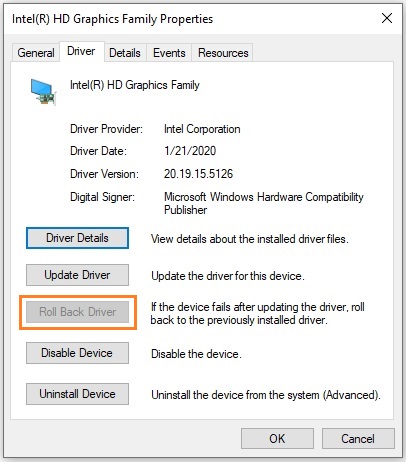
If the updates aren’t available, use ‘Roll Back’ to go to a previous version of the driver.
1) Right-click the device driver under the Display adapters section and go to Properties.
2) In the Properties window, under the Driver tab, select the Roll Back Driver option if it is available. Follow the on-screen instructions to complete the process.
Reinstall Drivers:
If the drivers are corrupt, you will need to reinstall them again.
1) Right-click the device driver under the Display adapters section and then select the Uninstall device option. Follow the on-screen instructions to complete the uninstallation process.
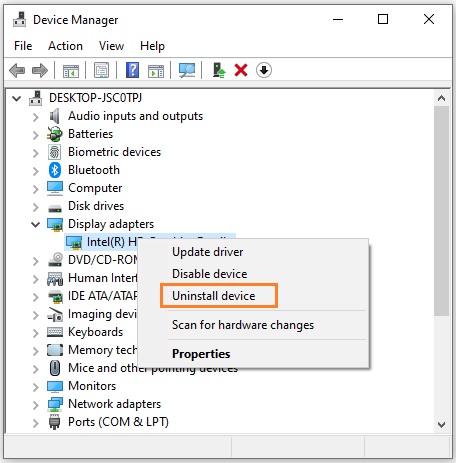
2) Restart the PC. The uninstalled drivers will be installed automatically.
Note: If the drivers fail to install automatically, you can download the drivers from the manufacturer’s website and install them manually.
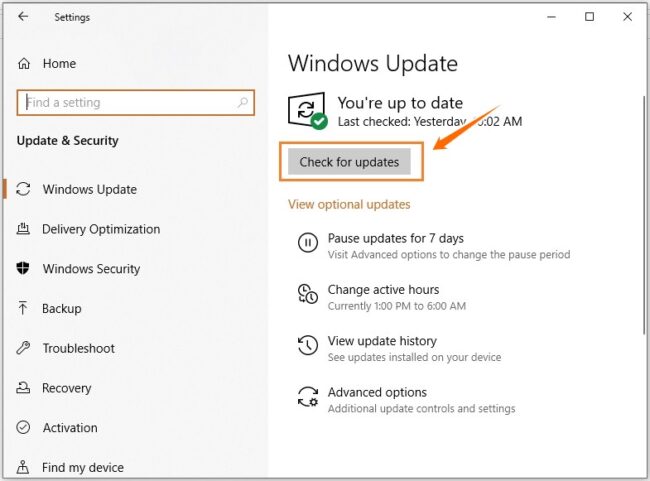
Fix #3 – Update Windows
Since an outdated Windows build can cause the display driver issue, it is best to install all pending updates. You can install the latest Windows updates by following the steps below:
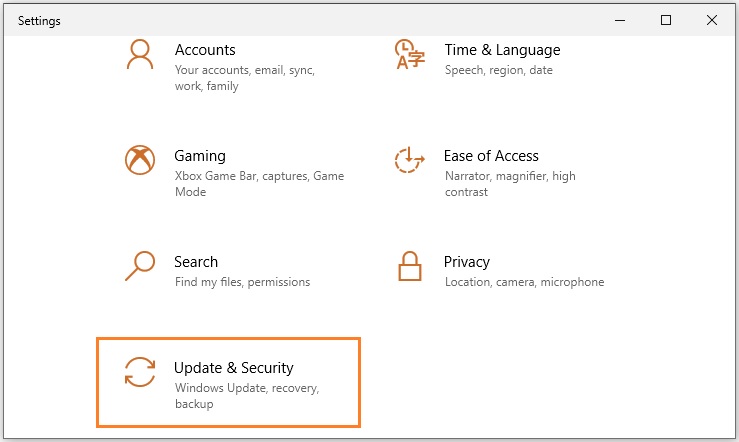
1) Press Windows+I and select the Update & Security from the menu.
2) Click on Check for updates and install the latest updates. If there are any pending updates already available, install them first.
Fix #4 – Run an SFC Scan
Windows uses system files regularly to maintain sessions and functionality. If for some reason, these system files get corrupted, the system can freeze, crash, or even run into other problems. This may be the reason for the ‘Display driver failed to start Windows 10’ issue. Fortunately, these files can be checked for any issues using the ‘System File Checker’ tool. To run the SFC scan, follow these instructions:
1) Press Windows+S and type “cmd” in the Search box. Open the Command Prompt as administrator.
2) Enter the following command: “sfc /scannow” and press Enter.
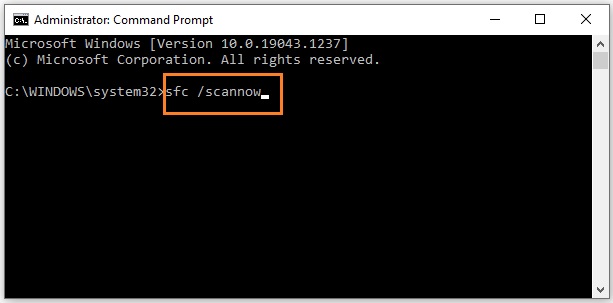
3) Once the scan is complete, restart the PC.
After restarting the PC, any corrupted system files will be fixed automatically.
Fix #5 – Scan PC for Malware/Virus
Malware and viruses can cause decreased performance and other functionality failures in your PC. It may be that a virus/malware is triggering the display driver error in the first place.
In this case, you’ll need to scan your PC using third-party antivirus software or even the Windows Defender and remove the malware from your device.
Fix #6 – Use Windows Restore
If everything has failed so far, one option is to use the Windows ‘System Restore’ feature. Using this feature, you will be able to revert back to a version of Windows without the error. Though, this method won’t work if there aren’t any restore points created before. If no restore points are available, move to the final solution.
Step 1: Press Windows+S and type “Control Panel” in the Search box. Open the Control Panel.
Step 2: In the Control Panel search field, type “Recovery” and open the Recovery settings. Click on the Open System Restore option.
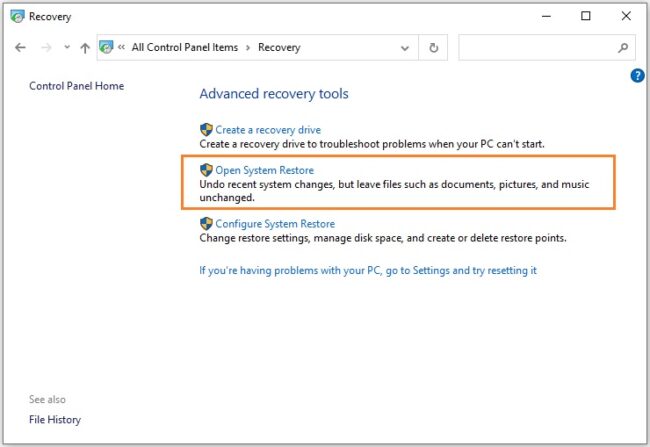
Step 3: Once the System Restore setup window opens, click Next. Checkmark the Show more restore points box.
Step 4: From the list of restore points, select the one that you believe was the error-free version of Windows back in time. Click Next and then click Finish to start the System Restore process.
Note: Recall the time when Windows did not have the ‘Display driver failed to start’ error. Select that version of Windows from the list of restore points provided.
Fix #7 – Reinstall Windows
If the Windows ‘System Restore’ feature does not apply to you, then a ‘Clean Install’ of Windows is what you need to do. A clean install will erase all previous data, so make sure to back up all the data. Once Windows is installed fresh, the ‘Display driver failed to start’ error won’t be a problem anymore.
Note: If a ‘Clean Install’ isn’t an option for you, you can reinstall Windows without losing your data. However, a clean install is the recommended option and the most effective out of the two.
READ NEXT
![NVIDIA Control Panel Missing? Easy FIX [2022 Update]](https://digiworthy.com/wp-content/uploads/2022/06/NVIDIA-Control-Panel-missing-768x464.jpeg)