Fix: HyperX Cloud Stinger Mic Not Working

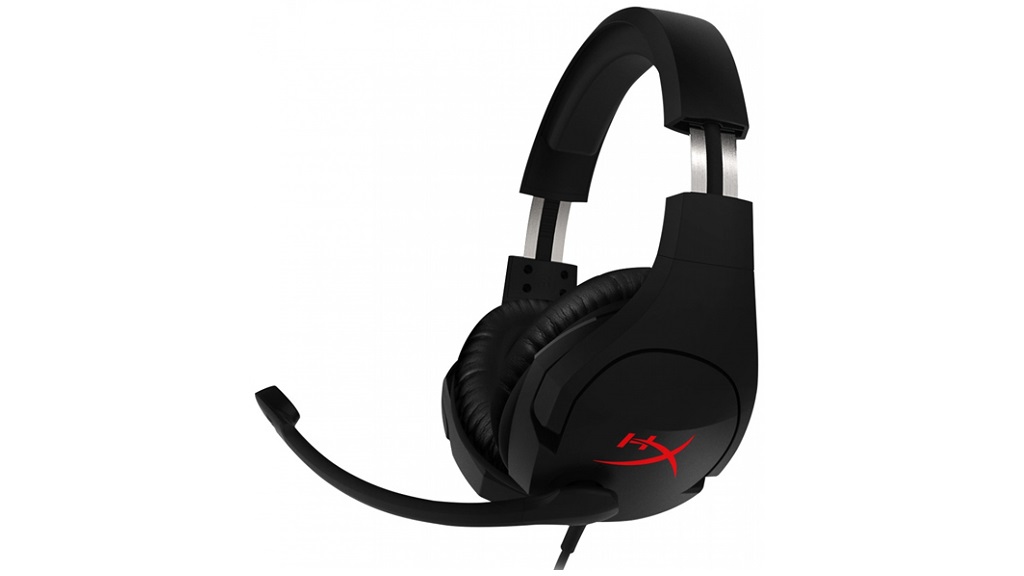
If you are a hardcore gamer, then you must understand the importance of audio in gaming. The HyperX Cloud Stinger headset is specifically designed for users to get the best audio experience so they can truly enjoy their game. Although it gives stellar experience, the microphone on the headset can act up at times. If you are one of those users whose HyperX Cloud Stinger mic has stopped working then you have come to the right place.
HyperX Cloud Stinger Mic Not Working? Try these Fixes
As frustrating as it can be, we have found some of the best ways through which you can get rid of this HyperX Cloud Stinger mic not working issue. These methods include:
- Check your connections
- Enable audio devices
- Set HyperX Cloud Stinger mic as the default device
- Update your headset driver
- Reset/reinstall Windows
Fix #01: Check your connections
The first and the most simple cure to your problem is to check your connections. Many times the connection is loose or the microphone is not plugged in properly which leads to mic failure. Check and fix the loose or hanging microphone connected to your device to solve the issue in no time.
Fix #02: Enable audio devices
Your HyperX Cloud Stinger mic may not be working because your audio devices are disbaled. You can enable them from audio settings on your device. Simply go to your audio settings and enable the mic and speakers from there. Make sure they are not muted or the volume is not too low, which might make you think that the mic or speaker is not working.
Fix #03: Set HyperX Cloud Stinger mic as the default device
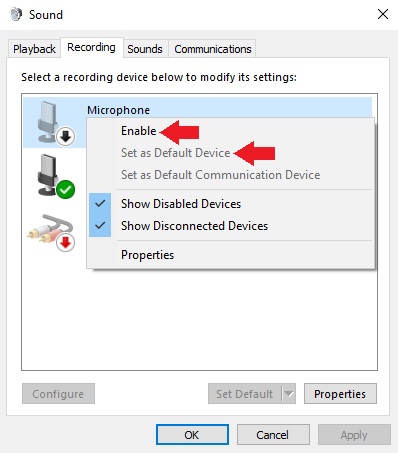
Maybe your HyperX Cloud Stinger mic is disabled or not set as the default device on your computer. You can easily re-enable it and set it as the default device as follows:
- Press Win+R key to bring up the Run dialog, then type “control” and press Enter.
- In Control Panel, select Large icons from the View by drop down menu in the top right corner.
- Click on Sound.
- Click the Recording tab, then right-click on any empty place inside the device list and select Show Disabled Devices.
- Right-click the Headset Microphone and select Enable. Then right-click it again and select Set as Default Device.

Fix #04: Update your headset driver
The mic on your HyperX Cloud Stinger headset won’t work if you are using wrong or outdated driver. So you should update the driver to see if that’s a problem for you. Follow these steps to do this:
- Open the Sound window following the first three steps from the above Fix #03.
- Go to the Playback tab, right-click on your headphones and select Properties.
- Click on the Properties button in the Controller Information section.
- Then click Change Settings.
- Click the Driver tab and select Update Driver.
- Let the Windows Search automatically for updated driver software.

Once you’ve updated the driver for your HyperX Cloud Stinger headset, restart your computer. Then check to see if the microphone is working.
Fix #05: Reset/reinstall Windows
If the issue persists, chances are your operating system has corrupted files or configurations that are preventing your headphone’s mic from working properly. You can reset or reinstall Windows to solve this problem. Remember to back up your computer first to help avoid any data loss.
Once the Windows is reinstalled on your PC, reinstall your headset and see if it fixes the problem for you.
In case the mic on your HyperX Cloud Stinger headset still isn’t working, it’s probably a hardware issue. Contact Kingston technical support for further assistance.

![[FIXED] Discord Fatal JavaScript Error Occurred](https://digiworthy.com/wp-content/uploads/2020/11/Discord-Javascript-Error-img0-768x375.png)


![[Fixed] Windows Error 0x7E: Autorun.dll could not be loaded](https://digiworthy.com/wp-content/uploads/2023/08/Error-0x7E-Autorun.dll-could-not-be-loaded-768x431.webp)
![[Solved] GeForce Experience Error Code 0x0003](https://digiworthy.com/wp-content/uploads/2019/12/fix-geforce-experience-error-code-0x0003-768x432.jpg)
![Twitch Mods Not Loading [Quick Fix]](https://digiworthy.com/wp-content/uploads/2020/11/Twitch-Mods-not-loading-img1-768x460.png)